Piltastene flytter visningen. + og − endrer zoom. 0 viser hele rommet.
Bilder og originaltekster
Tekster og forespørsler på engelsk
Les originaltekstene
The first colour decision
The coast photograph became the start of the studio notebook. Pale stone, dark seams and a thin line of green offered a palette I could use with cloth. I wanted the room to carry those colours without becoming a picture of the sea. The stripes in the rock suggested seams, borders and the spaces between separate pieces.
A room that can hold a process
The first idea for the studio was a room where the work could remain between visits. At home, a meal meant clearing the table. A shirt repair shared space with a stack of letters, and a quilt spent half its life inside a bag. I wanted one surface for cutting, one chair for hand stitching and a wall where unfinished work could stay in view. The coast photograph helped me give that wish a shape. It showed separate layers that belonged to one surface. Each pale area had a dark edge, and each edge made the next area easier to see.
I wrote a list beneath the photograph: keep the room open; let the materials carry the colour; leave space around work that needs attention. I did not want a room filled with matching containers before there was anything to put in them. The first purchases would need to answer an actual problem. A table would need room for a quilt, not a set of decorative objects. A shelf would need to hold folded cloth without crushing its edges. A lamp would need to make a needle visible when the window light had gone.
The notebook began with these decisions because I knew I would forget the reason behind them. A photograph can preserve a colour but cannot explain why I chose it. The notes give the photograph its job. They will let me compare the room I build with the room I hoped to have. When a choice feels wrong, I can return to this page and ask whether it supports the work or fills a gap I could have left open.
A place for uneven edges
The boulders made me think about the cloth I keep. Some pieces have faded borders, small holes or a line where a pocket used to sit. Their differences give a finished quilt its shape. The studio should have room for those edges. I chose a shelf for folded remnants instead of hiding them in a drawer with new fabric.
What the remnants are allowed to keep
A stone does not need a straight edge to sit beside another stone. That thought became useful when I opened the bags of fabric I had saved. There were shirt cuffs, a cotton curtain, a piece from a failed dress and strips left from a cushion cover. Their colours did not match a shop collection. Their sizes did not fit a single cutting plan. I could have trimmed them into one repeated square, but that would have removed some of the details that made me keep them.
The boulder photograph became a reference for balance rather than a pattern to copy. Large forms carry the weight, and small forms occupy the gaps. I tested that idea with the cloth on the floor. A broad cream piece made room for a narrow stripe. A dark scrap gave a faded pink patch an edge. I wrote down which pieces needed support and which could become a focus. A weak corner might need a backing patch. A strong stripe could guide the eye through a group of small shapes.
This record will matter when the work leaves the cutting table. I want visitors to understand that an uneven piece was a choice, not an error I failed to notice. The studio wall will need to show a few steps before the finished object. Keeping this photograph beside the first fabric tests gives the later display a point of reference. The stones offered a way to see the materials I had. The quilt will need to show whether I learned anything from that way of looking.
Lines that find their way
The stream bends around stones instead of following a grid. I used its direction to sketch a path through the room: door, material shelf, worktable, display wall. That path should give a visitor a way to understand the work while leaving the centre of the table free for making. A clear route matters more than a perfect row.
Following the work through the room
The first floor plan put every piece of furniture against a wall. It left a large space in the middle and made the table look like an island. The arrangement seemed useful on paper, but I could not see where a person would start. A visitor would enter, stop at the first shelf and miss the work that shelf supplied. I wanted the room to tell a small story without signs at every step.
The stream photograph offered a different plan. Water finds a route between things that cannot move. In the room, the window, the door and the power sockets were the fixed points. I drew a route that began at the remnants shelf, passed the cutting surface and ended at the display wall. The chair could sit beside that route rather than block it. Someone watching a stitch could see the material it came from and the object it would become. A view across the room would connect the three stages.
I tested the route with empty boxes before choosing a table position. Carrying a folded quilt through the gap showed that a measurement on a plan was not enough. The width had to work while my hands were full. The chair needed space to pull out, and the door needed its whole swing. I marked those clearances in the notebook. The photograph remains a record of the idea behind the route, while the measurements record its limits. Both belong to the plan. A route that looks graceful but makes a person turn sideways with a box would fail the purpose of the room.
A small detail can lead
A leaf can hold a whole set of shapes. The droplets made me stop looking for a single grand reference and start recording details: a seam, a frayed edge, a circle left by a cup. I want the studio notebook to preserve those small observations beside the larger room and project photographs, where they can keep their meaning.
The scale of attention
Most of the first photographs in the notebook showed whole places: a coast, a room, a table. The leaf changed the scale. Its surface had a shape I could understand without seeing the plant or its pot. A few drops caught the light, while the veins gave them a direction. I thought about a hand stitch in the same way. From across a room it becomes a line; close to the cloth it holds separate decisions about spacing, tension and where to stop.
I made a rule for recording the studio: take a view of the whole, a view of the work in use and a view of one detail. The whole view will help me remember where things belong. The working view will show how hands and tools meet the material. The detail will keep a choice that a distant photograph could lose. I will pair each view with a note that says what I was trying to learn. Three pictures of the same object can repeat information if the question stays the same. Changing the question gives each picture a reason to exist.
For the first quilt, the detail will be the place where the blue shirt stripe meets the cream cloth. That join has to carry different weights without pulling one side into a ridge. I have not solved it in this entry. The leaf is a reminder to look before deciding. The studio will need enough light, enough empty table and enough time for a small join to receive the attention that a finished object can conceal.
Cloth that shows its weave
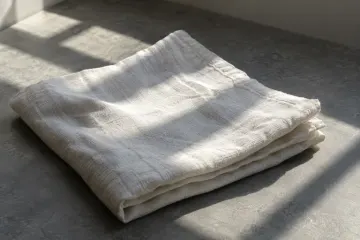
The pale linen will become a background for tests, not a surface that must stay clean. Its weave gives a dark thread enough contrast to be seen. I kept a full length for the display table and saved the cut edge for seam trials. Both pieces belong in the material record because they will wear in different ways.
A useful background
I brought three pale fabrics to the window and put the same navy patch on each. One cloth reflected enough light to flatten the thread. Another had a yellow cast that changed the pink scrap beside it. The linen kept its own texture while allowing the smaller pieces to remain distinct. I chose it for the test surface and wrote down the decision before the comparison could blur in memory.
The choice has a cost in use. Linen creases, and the folds can become stronger than the work placed on top. I will need to stretch the display length across the table without pulling it into a drum. The offcut will serve a different purpose. It can take chalk marks, pin holes and trial stitches. I do not want to treat both pieces as if they need the same care. The display cloth helps someone see a finished piece; the offcut helps me make one. Their condition will tell different parts of the story.
I washed the trial strip before cutting a square. The edge changed enough to remind me that a fabric description is not a measurement. I noted the starting width and the width after drying. Those numbers will stay with the fabric record, alongside a photograph of the weave. A future cushion or wall piece may need that allowance. Keeping the test beside the material should prevent a good colour match from concealing a poor construction choice. The studio is meant to hold this kind of knowledge: small, practical and easy to lose when the finished object takes all the attention.
The edge under the cloth
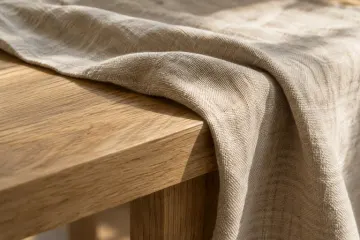
The table edge matters when I pull a quilt across it. A sharp corner can catch a loose thread or press a crease into batting. The oak reference has a rounded edge and a surface with enough grain to show wear. I used it to explain what I wanted from the worktable: support for the cloth, space for hands and a finish I can repair.
Choosing a surface for work
I measured the cloth before looking for the table. That reversed the order I had followed in earlier rooms, where a table arrived first and every project had to adapt to it. The longest piece for the first quilt would need support while I pinned the layers. I could accept an edge falling over one side, but not a whole corner hanging into the walking route. I recorded the dimensions and marked the minimum clear area with string on the floor.
The oak and linen photograph helped me discuss the edge with the person who offered an old table. Its top had marks from years of use. Those marks did not trouble me, but a rough patch near one corner caught the trial strip. I sanded a small area and tested it with the same cloth. The change mattered more than a coat of colour. I wanted a surface that could be maintained, not one that would make me afraid of a scratch. A worktable should be allowed to gather evidence of work.
I decided to keep a thin board for cutting and a padded cloth for pinning. They can share the table at different stages without pretending that one surface can do every job. The notebook now has a list of what each layer protects: the cutting board protects the wood; the pad protects the needle tips and gives the cloth a grip; the bare table carries the weight. The photograph records the relation between those layers. It is a material decision, a furniture decision and a plan for how the room will be used.
A palette with room to change
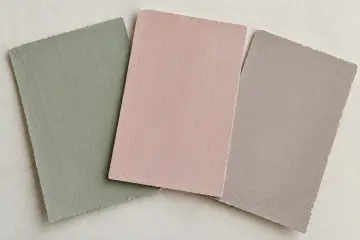
The swatches brought the room colours into one place. Sage belongs to the plants, clay to the pots, pale cloth to the table and dark blue to the quilt. I left out colours that had no object behind them. This record is a starting point for choices, not a rule that every future piece must obey.
Colour without a shopping list
The swatch group began as a way to compare things I owned. A scrap of cloth, a piece of wood and a photograph of a pot could sit beside each other without requiring a purchase. I wanted the studio to grow from those materials. It would have been easy to turn the palette into a list of matching new objects, but that would have given colour more authority than use.
I kept four colour families and wrote an object beside each. The green came from the leaves and the watering can. The warm red came from the pots and a small part of the quilt. Pale shades belonged to the table covering, the walls and the fabric ground. Blue came from the shirt and the dark pieces that would hold the quilt together. When a new item enters the room, I can ask what it does before asking where it fits in this group. A tool that works can earn its place without sharing a colour with a cushion.
The swatches revealed a problem I would have missed from names alone. Two pieces described as cream looked different in the window. One leaned toward pink and made the clay sample look dull. I moved that piece out of the main group and kept it for an inside facing, where it could serve the work without changing the whole palette. This note records the reason rather than treating the rejected piece as waste. The material record should retain alternatives, because a choice that fails in one relation may solve a different problem in another project.
The shirt before cutting
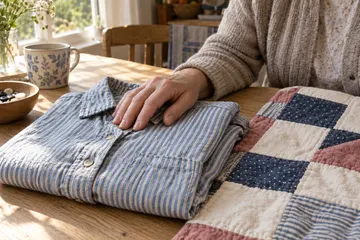
The blue shirt was worn through at one elbow, but its back panel remained strong. I photographed it before cutting because the finished quilt would no longer show its shape as a shirt. The buttons and pocket went into a separate envelope. The cloth could become something new while the record kept what it had been.
Permission to use a kept thing
The shirt had stayed in a bag because cutting it felt like a decision that could not be undone. I could see useful cloth, but I could also see the shape it had held for years. Keeping the whole shirt preserved that shape and prevented me from using most of it. I needed to decide which part of the memory belonged to the object and which part could survive a change.
I laid it on the sewing table beside the cream and pink pieces. The stripe gave the group a direction that none of the plain scraps could provide. Before opening a seam, I recorded the collar, the pocket and the worn elbow. I wrote down why I wanted the cloth in the quilt: the blue would connect its small sections, and the worn surface would belong beside other used material. The record gave me a way to keep the shirt visible after it became separate pieces. It did not make the cut reversible, but it made the choice understandable.
The strongest area was the back. I marked around the thin places rather than cutting a rectangle through them. The pocket stayed intact for a future repair project, and the buttons went into an envelope with the date. I do not need every part to appear in the quilt. Leaving some pieces unused is different from losing them. This entry holds the before state, the reason for the change and the first allocation of the material. If the finished quilt becomes the studio's focal piece, I want its starting point to remain as easy to find as its last stitch.
A room to stay in
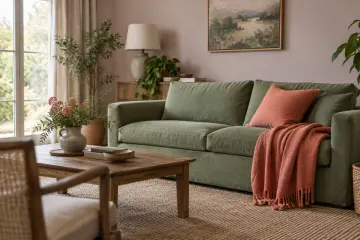
This room reference helped me think beyond storage. The studio needs a place to put a cup down, read a note and look at work without holding a tool. I kept the relation between wood, green and cloth, then removed anything that would take space from the making area. Comfort has a job when it lets someone stay and pay attention.
Keeping a pause inside the room
The first furniture list treated the studio as a set of tasks: cut, stitch, store and display. It left out the moments between them. I would need to read a set of notes, wait for cloth to dry, compare two versions or talk with a visitor. Those pauses were part of the work rather than empty time to be designed away. The interior reference reminded me to give them a place.
I could not fit a sofa in the room without losing the clear route around the table. The useful part of the reference was the way a seat, a surface and a light source formed a small area within a larger one. I translated that relation into a chair beside a narrow shelf. The shelf would hold a cup and the current notebook. The chair would face the display wall so that sitting down did not mean turning away from the work. A plant could occupy the window edge without becoming an obstacle on the floor.
I marked this corner as a place where tools return to a box before a cup arrives. That boundary will need attention during open days. A comfortable seat does not make a room safe if a needle is lost in the cushion. I wrote the reset steps beside the furniture sketch: close the scissors, count the needles, clear the shelf and put the cloth on the table. The photograph keeps the atmosphere I wanted, while the notes show what the studio needs to do to support it. Both will be useful when the room fills with actual materials.
A chair with a view
I chose the chair position by sitting with a folded quilt on my lap. The light needs to reach the cloth without putting my own shadow over the stitch. The chair must leave space for someone to pass behind it. Its view of the display wall will help me compare a small repair with the whole piece.
Testing the corner with a body
A chair can fit on a plan and fail when someone uses it. I brought one from home for a week before choosing the studio chair. With no fabric on my lap, the corner seemed generous. With a quilt, a box of thread and a cup on the shelf, I could see where the plan was wrong. The chair needed room on the side where the quilt would fall, and the shelf needed to be within reach without forcing me to lean over a loose needle.
The armchair reference gave me a way to judge the space beneath and around the seat. A clear floor would let me see a dropped spool. A firm seat would support a long stretch of hand stitching. I did not want a chair so deep that getting up required gathering the work into a bundle. I tested the movement with the quilt folded and unfolded. The notebook now records that practical test beside the photograph, rather than a claim that the chair is comfortable for everyone.
The final position faces the display wall at an angle. I can look up from the corner I am stitching and see the whole quilt. That relation should help when a border feels too heavy or a patch pulls the eye away from the centre. It gives the pause corner a role in making decisions. I will keep the floor around it clear during open days, because a visitor may need more room than I do. The photograph is a reference; the clear route and the working posture are the things the studio has to preserve.
Light for the last seam
Window light gives the room its character, but a winter afternoon needs a lamp. I want light to fall across the cloth so that a raised seam remains visible. The lamp belongs beside the chair and must leave the walking route clear. Its cable needs a path that does not cross feet, chair legs or fabric.
The work after sunset
I stayed in the room until the window became a dark rectangle. The pale fabrics remained visible, but the navy patches lost their stitch lines. A ceiling light filled the room without helping me judge thread tension. The lamp needed to serve a small task, not replace the daylight in every corner. I wrote down the difference because a bright room can conceal a poor working light.
The curved lamp reference suggested a shade that could reach over the work while its base stayed outside the chair movement. I tested the height with a borrowed light and a dark scrap. A low angle showed the ridge of the seam; an overhead position flattened it. I marked the useful range on the room sketch. The light would need adjustment when the chair moved, so I left space for a hand to reach the switch without crossing the quilt. The cable would follow the wall to the socket and remain clear of the door.
This entry is not a specification for a particular lamp. It records the conditions I want to test before keeping one: enough light for dark thread, no glare on a needle, a stable base and a route free of cable. A visitor at the table may need a different angle, and I will need to check that arrangement during an open session. The photograph holds the form I liked; the dark scrap provides the test. Keeping both in the same record should stop the shape of a lamp from becoming more important than the work it has to illuminate.
One object on the shelf
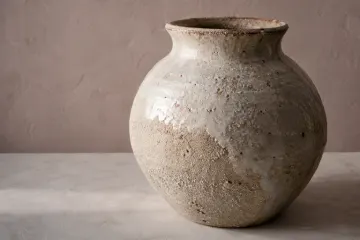
The vase gave the window shelf a centre without filling it. I kept dry stems there because a spill beside stored cloth would create a problem. Fresh plants will stay on trays in the growing corner. The difference belongs in the room plan: some objects are references for colour, while others require water, light and a place to drain.
The work an object brings
The first shelf arrangement included a vase, two pots, a stack of books and a bowl of thread. It looked complete in a photograph and gave me no room to place the notebook I was using. I removed the objects and returned them one at a time. The vase earned its place because it gave the shelf a point of reference without needing to move during work. The books went beside the chair. The thread returned to the tool box, where I could count and find it.
The clay colour connected the shelf to the balcony pots, but the vase would have a different kind of life. Dry stems would stay there through the season. The living plants needed watering, drainage and room to grow. I did not want to treat them as fixed pieces of the interior. Their leaves could reach toward the light and change the view. I drew a wet zone on the room plan and kept it away from the cloth storage. That small division would make the room easier to care for.
The photograph helped me notice how much space an object needs around it. A vase against a crowded stack becomes a gap filler. With a clear edge it can give the shelf a purpose and leave room for use. I want the display wall to follow the same principle. A finished quilt will need enough open wall for its outline to remain visible. The shelf test is a small version of that decision, and its notes will help me recognise when a later arrangement begins to lose the space that made it work.
The first arrangement of pieces
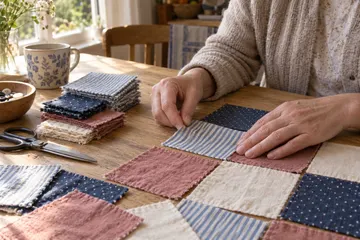
I cut the strong cloth into pieces that could keep their differences. Blue stripe gave direction, navy gave weight, and cream made space between the darker shapes. Before joining them, I photographed the whole table and marked the pieces that had a fixed place. The first arrangement should remain available when I compare later versions.
Deciding what must stay
The loose pieces could move without cost, which made it hard to stop rearranging them. A navy square could anchor one corner and leave another corner without weight. A stripe could lead toward the centre or pull attention out of the edge. I needed a few decisions to hold while I tested the rest. I chose the largest shirt piece, one cream area and a pink patch with a worn border. Their relation gave the quilt a starting structure.
I photographed that structure before moving any smaller pieces. The record includes the whole table, not a crop of the best corner. It needs to show the gaps and the places that were unresolved. I wrote a reason beside each fixed piece. The shirt belongs near the centre because it connects the cloth to its earlier life. The cream needs room to keep the centre from becoming dense. The pink piece sits near the edge because its worn border can become part of the binding story. These are choices I can revisit, but they should not vanish through a series of small adjustments.
I made one version with the dark pieces in a row and another with them spread across the field. The second version let the eye travel through the cloth, while the first gave too much weight to a single band. I kept both photographs and noted the difference. The studio wall will need to show a process with alternatives, not a straight line from idea to success. This record is the first test of that kind of honesty: the pieces have a structure, and the structure remains open to change.
A lesson at the table
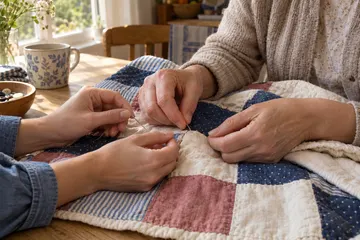
We used the cream corner for the lesson because a dark thread could show the path of each stitch. The cloth stayed on the table while our hands shared its weight. I noted the point where the stitch began to pull. That small error taught me more than a perfect sample would have, and it belongs beside the photograph.
Learning to see tension
The lesson began with a line of stitches that looked even from a distance. When I lifted the cloth, the edge curled. I had pulled each stitch to make it look tidy, and the small pulls had gathered into a ridge. The problem was not visible in the movement of one stitch. It appeared in the relation between a whole line and the fabric it was meant to join. We laid the corner on the table and looked at it before taking anything out.
I opened a short section and made the stitches again with the cloth supported. The thread lay against the surface instead of cutting a narrow channel into it. I wrote down the sequence in words I could use at the next session: support the weight, take a small bite of cloth, leave the thread on the surface, look at the line before continuing. The note does not replace a lesson. It preserves the part I would be most likely to forget when trying to finish a border.
The photograph shows two sets of hands and no completed result. That is its value in the studio record. Someone else helped me notice a problem that I could not name. I want the open table to allow that kind of exchange without asking a visitor to arrive with a finished skill. A scrap and a short line of thread can give us enough to discuss. I kept the first ridge as a test piece rather than hiding it in the bin. It will sit beside the corrected line so that a future visitor can see what changed and what the change was meant to achieve.
A seam that joins two weights
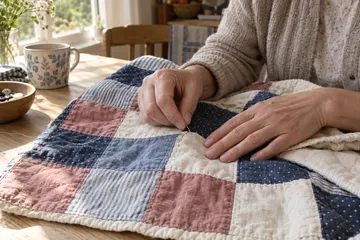
The shirt cloth and the cream patch had different weights. I supported the lighter edge while joining them, then checked the seam with the quilt lying flat. A good join needs to carry the difference without turning it into a ridge. I kept a note of the thread and stitch length beside this photograph for the next repair.
The middle of the work
This photograph comes from the stage when the quilt had enough shape to recognise and enough loose edges to demand patience. It no longer looked like a collection of scraps, but it could not support its own weight. Moving it meant carrying the whole field of cloth rather than lifting a corner. The table became part of the construction, holding the sections level while I worked along a join.
The blue shirt cloth was thinner than the cream patch beside it. I tested a short seam and looked at it with light across the surface. A tight line made the shirt fabric pucker. A loose line left a gap that caught a fingertip. The useful result lay between those two failures. I recorded the test length, the thread and the point at which I stopped adjusting. Without that note, I could have spent the next session repeating the same comparison and calling it progress. A process record can save attention for a new problem.
I left the unfinished seam on the table at the end of the day and placed the needle in its case. That act was part of the reason for making the studio. The cloth did not have to return to a bag, and the next visit could begin with looking rather than unpacking. The photograph keeps the table, the hands and the cloth in one frame. It shows that the room supports the work, not that the room has reached a final state. I want that relation to remain visible when the finished quilt is hung on the wall.
The weight of the whole piece
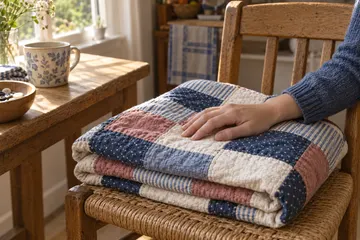
Folding the quilt showed how its layers behaved as one object. The centre settled into the chair, but one border resisted the fold. I marked that edge for a last check before calling the work finished. The photograph records a pause in making, when the quilt could leave the table but had not yet earned its place on the wall.
A test beyond the table
The quilt had spent weeks spread across a flat surface. In that position, I could assess colour and seam lines but not the way the whole object would fall. I folded it on the chair and let its weight settle. The fold made one thick join visible. It did not ruin the quilt, but it changed the way the edge rested against the seat. I returned that section to the table and checked whether the bulk came from the seam allowance or the stitching.
The answer was in the folded layers. Two allowances had met at the same point, and a dense line of quilting had held them into a lump. I opened a short stretch, spread the allowances and remade the line. The corner lay with less resistance. I kept the photograph of the first fold because it explained why I had changed a seam that looked acceptable on the table. A finished object needs to be assessed in the conditions where it will live, not in the conditions that flatter the work.
The chair test led to another question: would the quilt remain a wall piece or return to use? I did not want a display method that made the answer permanent. A fabric sleeve could carry a hanging rod without asking the binding to hold all the weight. The sleeve could be removed if the quilt became a cover again. I added that decision to the next stage of the notebook. The folded quilt is the bridge between making and display, and its small problem gave that bridge a practical purpose.
A place for the finished quilt
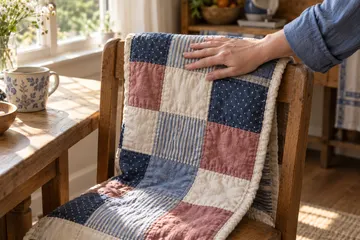
The finished quilt rests on the chair where I tested its weight. I can see the shirt stripe, the cream field and the pink border from the doorway. It will move to the display wall for the open day, but this view matters because it shows the work in use. A finished piece can hold a room without becoming untouchable.
What the display should leave visible
The chair gave the quilt a shape that a flat photograph could not show. It crossed the back, folded over the seat and held its weight at the corners. The pattern changed with those folds. Some pieces disappeared, and others became a focus. I wanted to keep that view in the display record so that the wall version would not become the only account of the finished work.
I made a list of what a visitor should be able to learn from the display. They should see the shirt before it was cut, the loose arrangement, a seam in progress and the finished quilt. They should be able to connect a note about tension to a place in the cloth. The object does not need a long label that tells someone what to feel. It needs enough context to let them follow a decision. I will keep a small set of test pieces on the table and leave the whole quilt clear of captions pinned to its surface.
The hanging sleeve will carry the weight across the top edge. I tested it with a rod on the table before choosing a wall position. The wall needs room around the quilt, a clear path beneath it and light that does not flatten the stitches. I have not decided how long it will stay there. The display should support a conversation and allow the quilt to return to the chair. This entry records that intention, so a later photograph of a finished wall does not erase the other life the object was made to have.
Two objects and a clear surface
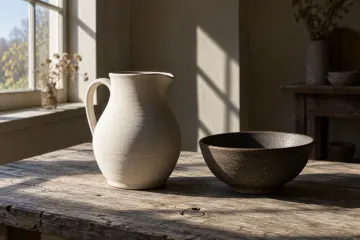
The pitcher and bowl show how a pair can share a table without matching. One holds a tall shape; the other gives it a low, dark counterweight. I used that relation for the display table. A small finished piece can sit beside its material sample, provided each has enough space for the difference to be seen.
A display that invites comparison
I placed a finished cloth piece beside a stack of its remnants and found that the stack took all the attention. Its cut edges made a dense pattern, while the finished piece had a quiet surface. I needed to decide what comparison I wanted a visitor to make. The pitcher and bowl photograph helped me see that a pair does not need equal size or equal weight to form a relation.
For the cloth display, I reduced the remnant group to three pieces: one before cutting, one test seam and one unused strip. The finished work could remain the focus, while those samples gave it a visible origin. I placed the notes on the table beside the samples rather than above them. A visitor could read a short observation and look at the actual join without having to search across the room. The larger process notebook would stay available for anyone who wanted the full sequence.
I checked the arrangement from the doorway and from the chair. The table edge concealed one sample from the seated view, so I moved that sample toward the front and gave the tall object more space behind it. This was a small change with a reason tied to use. I want to record such changes because the final photograph can make them look inevitable. They were choices made after a person sat down. The display needs to remain open to those tests during the first open session, when another person's attention will reveal gaps I cannot see from my own place at the table.
The living part of the room
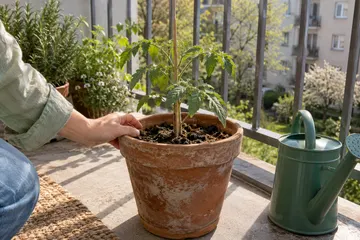
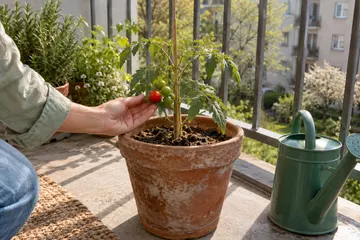
The tomato plant began as a small shape beside the workroom window. Its pot, support and watering can gave the growing corner a structure, but the plant would change that structure. I recorded the first height and leaf group so that later photographs could show growth instead of treating every green plant as the same decoration.
Making room for something that changes
The plant entered the studio plan before the quilt reached the wall. I wanted the room to hold a living process beside the cloth process, with each following its own pace. A seedling would not finish on the date of an open session. It would need water on a day when I wanted to stay at the table, and it would need light whether the room arrangement looked balanced or not. That obligation made it a useful part of the plan.
I set the pot on a tray and left room to lift it without brushing the cloth shelf. The watering can stayed on the floor beside the wall, away from the route to the chair. I recorded the support position before the stem needed it. Waiting until a plant leans can turn a small task into a repair. The photograph keeps the first arrangement visible so that I can compare growth with the space I allowed. If the leaves reach the window frame, the answer will be to move the pot or the work, not to pretend that the plan was fixed.
The plant record will have its own short notes: new leaves, flowers, fruit and the days when the soil stays wet. I do not need to force those observations into the quilt's timeline. They can sit beside it and show that a studio has more than one kind of progress. A finished wall piece, an unfinished seam and a seedling can share a room without reaching the same point. The growing corner gives the display that unfinished edge, and this first photograph will help the later pages retain it.
Flowers beside the worktable
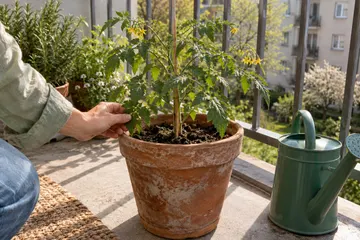
The first yellow flowers appeared while I was preparing the display notes. They brought a colour that was absent from the cloth palette. I kept it in the record instead of changing the room to match it. The growing corner can introduce a new focus, and the notebook can show why it belongs beside the earlier green leaves.
A change I did not arrange
The flowers appeared between visits. I had left the plant with a set of green leaves and returned to find small yellow shapes under the upper stems. They changed the way I looked at the corner. The watering can and the pot had seemed like the main forms, but the flowers brought attention into a small space above the rim. I took a photograph at the same distance as the seedling view to preserve that change in scale.
The studio preparation was full of decisions I could control: a hanging height, a label length, a route past the table. The plant gave me a different kind of record. I could provide support and care, but I could not make a flower arrive to suit the display. I wrote that difference into the notebook because the open session should not turn the whole room into a finished scene. I want visitors to see what is growing, what is being tested and what has reached a form I can use.
The yellow made me return to the material shelf. A small ochre scrap had remained outside the main palette because it had no relation to the first quilt. I placed it beside the flower photograph as a possibility for a future piece. I did not add it to the finished quilt. New ideas need a place to wait without reopening every earlier choice. The notebook can hold that possibility beside the plant record, while the quilt remains a record of the decisions that made it. This separation should help the studio grow without asking each new observation to change everything that came before.
A new stage at the window
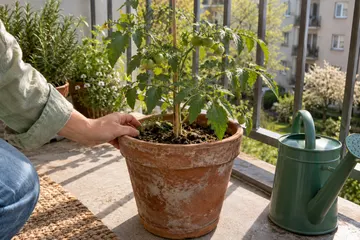
Green fruit gave the plant a weight that the flowers had not carried. I checked the ties and left room between the stems and the railing. The open studio record begins with this change because it shows the room continuing to develop while the display takes shape. The plant will not wait for the table to be ready.
Opening a room with work in progress
I had imagined opening the studio on a day when every loose end had a place. The plant made that idea look strange. Its green fruit was a result of the care that had come before, yet the result was unfinished. There was no reason to hide it until it became red. The same could be true of a test seam, a half-filled notebook or a box of materials waiting for a project.
I changed the open session plan. The finished quilt would remain the main piece, but the table would hold a process that a visitor could enter. I would lay out two seam tests and leave space for someone to try a short line of stitches. The growing corner would keep its care notes beside the pot, away from the water tray. A person could read the plant sequence without assuming that every photograph belonged to the same day. Dates would give the separate changes a shared reference.
I checked the room route with those additions in place. A visitor stopping at the plant should not block someone returning to the table. The chair needed a gap for a bag and enough room to stand up with cloth in hand. I removed one small shelf rather than narrowing the path. This note keeps that decision visible because a full room can look more inviting in a photograph than it feels in use. The open studio should be able to receive a person, not merely hold an arrangement. The green fruit became the first reminder that an unfinished state can be a useful thing to share.
A wet morning before visitors
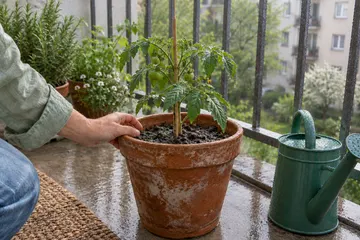
Rain changed the light in the room and left the balcony cloth-free. I moved the display samples away from the open window and checked the pot tray before returning to the table. The photograph belongs to the open studio record because care and weather remain part of the place even when there is a finished piece on the wall.
What the room needs on an ordinary day
The plan for an open session had been made in sunshine. Rain showed me which parts depended on that weather. The window ledge became a place where damp sleeves and watering equipment might meet the cloth. A sample near the sill would need to move. The room was not failing; it was giving me a condition I had not tested. I recorded the wet leaves and the changed light before adjusting the display.
I made a short preparation list for a rainy day. Keep fabric inside the dry zone. Leave a place for a wet bag by the door. Check that the balcony tray can hold the water it receives. Use the task lamp for a stitch demonstration instead of asking the window to provide the same light on every visit. These are small changes, but they affect whether someone can use the room without worrying about the work. I do not want the first visitor to become the person who discovers a wet floor beside the cloth shelf.
The photograph also changed the colour of the plant record. The green seemed deeper under cloud, and the drops gave each leaf a visible edge. I placed it between the green-fruit view and the first-red view rather than treating it as a separate subject. The sequence should hold changes in weather as well as growth. A memory of a place includes interruptions and care, not a series of identical clear days. The notebook can preserve that complexity without asking the display wall to explain all of it at once. A visitor who wants the long story can choose to read it.
One red point in the green
The first red tomato became a small focus in a plant full of green fruit. I held the branch to see its weight without picking it. The photograph shows the change before the harvest. I want that moment in the record because the bowl of fruit will show a result while this view holds the waiting that came before it.
A result does not erase the wait
The first red fruit was small enough to miss from the doorway. I noticed it while checking the support tie, not while looking for a finished result. Its colour made the surrounding green fruit seem less settled. The plant had reached a new stage without becoming a different plant. The pot, the railing and the watering can gave me the reference points that made that change visible in a photograph.
I thought about the quilt in the same way. The last seam would be one visible event in a long set of small decisions. A photograph of the finished piece could not carry the shirt, the first arrangement, the pulled seam and the correction on its own. I wanted the notebook to preserve those stages without turning each into a lesson for someone else. The personal reason for keeping them was enough: they would let me return to the work as it had felt before I knew how it would end.
The first-red note will sit beside the harvest note, with the whole plant photograph between them in the reading sequence. That relation gives the result a scale. One tomato can matter even when a later bowl holds many. I will use the same principle on the studio wall: keep a view of one seam near the whole quilt, and let a visitor move between them. The room should allow both kinds of attention. A large view can show how the work fits together; a small view can show the decision that made a particular part worth keeping.
A bowl beside the door
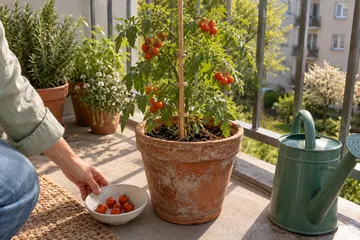
The first harvest filled a shallow bowl beside the plant. I took this view before moving the bowl to the studio table. The pot remains part of the photograph because the fruit belongs to a season of care, not a single meal. It gives the open day a quiet ending and leaves the next growth outside the frame.
What can leave the room
The bowl made the season tangible. Fruit that had appeared as small green points could be carried to the table, shared and eaten. The plant remained in its pot with more work ahead. I liked that difference. A studio can produce things that leave while the place and its habits remain. The notebook should be able to hold both without treating departure as a loss or keeping as the only form of care.
For the open session, I put the bowl on the clear shelf near the door, away from the sewing tools. The quilt stayed on the wall, the test pieces stayed on the table and the plant stayed where it could receive light. The room had several ways to be used, and each needed its own boundary. Food and needles did not belong on the same surface. A visitor should be able to choose a place to pause without learning that rule through a mistake. I wrote the arrangement into the preparation notes for the next session.
This photograph ends the first plant sequence but does not close the studio record. There will be another seam, a repair, a new material and a day when the room needs to change. I want the first open day to remain a point I can return to rather than a picture I must keep recreating. The photographs and notes now carry the choices that brought the room into use. A later entry can sit beside them and add a different view. Keeping the old record intact will let the next change be seen, whether it is a larger project or a small object placed on the table.
The leaf and the cloth
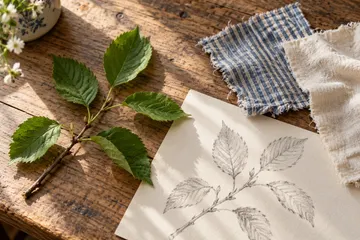
I put a leaf beside the stripe and drew its branch without trying to make a pattern. One form divides through growth; the other repeats through weaving. The pair gave me two ways to organise a surface. I kept the study with the inspiration records so it could remain a possibility rather than become a rule for the first quilt.
A reference that can remain unfinished
The leaf study began after I had chosen the first quilt fabrics. I could have added its shape to the quilt and made the project carry every idea in the notebook. That would have weakened the decisions I had made. Instead, I set a leaf beside a stripe offcut and recorded the difference between them. The stripe repeated at a steady interval. The branch divided at points that served the plant. Their relation interested me without requiring an answer that day.
I drew a few lines on a blank sheet and placed the offcut beside them. The drawing was a way of looking, not a plan for a finished object. I left room around it for later observations. A small wall piece might use a central branch with separate patches growing from it. A cushion might use the stripe as a border around an irregular field. Those possibilities can remain in the record while the quilt keeps its own structure. A notebook should be able to hold ideas at different stages without forcing them into one project.
The photograph needs the cloth, the leaf and the paper in the same frame because none of the three explains the study alone. The leaf gives the line a source, the drawing shows what I noticed, and the cloth gives the idea a material limit. Its width, weave and worn edge will affect what I can make. I added this entry after the first studio arrangement was complete. Placing it with the earlier inspiration records will let me compare a new observation with the ideas that started the room, while leaving the other chapters and their dates intact.
A place for the pieces that remain
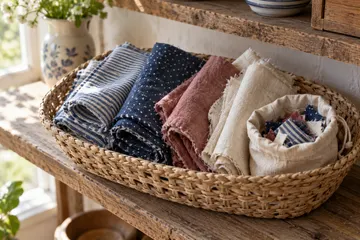
The basket holds usable pieces after the quilt has taken what it needs. Each fold leaves an edge visible, and the smallest scraps have a separate cloth bag. I want to find a material by touching and seeing it, without emptying the whole basket. The unused pieces remain part of the studio, with their own chance to become work.
Keeping material available
The first storage plan sorted cloth by colour. That looked clear on the shelf but made it hard to find the right weight. A thin shirt piece and a thick curtain offcut could share a colour and behave in different ways at a seam. I changed the basket so that the folded groups reflected use: light cotton, firm woven cloth and small remnants for tests. Colour could remain visible at the edges without becoming the only guide.
I attached a small paper record to the bag of pieces from the blue shirt. It names the source and the parts that remain, without pretending that each scrap will become something important. Some will become test seams; some may support a worn corner in another piece. Keeping a record helps me use them without having to reconstruct the whole story each time. The basket should make materials available rather than preserve them beyond use. I left space for a hand to lift a folded group without pulling every other group out.
The photograph enters the materials chapter after its first four records. It shows the consequence of making: the starting cloth has changed, and the remaining material has a different shape. I will keep the before-cutting shirt photograph beside this later view when I compare the source with what remains. The new entry should add that relation without replacing the earlier one. A studio grows through these changes in inventory as much as through finished pieces. A shelf that can show its contents, accept a new offcut and release an old one will support the next project better than a shelf arranged for a single photograph.
The room begins to work
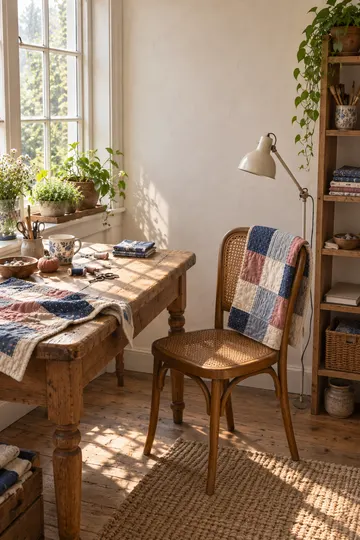
The table, chair and clear wall share one corner without closing the route from the door. The window gives the table light, while the task lamp reaches the hand-sewing seat. I left the wall empty for the first week so that the room could show me where work wanted to stay before I fixed the display positions.
A room tested through a week
The working corner changed after a week of use. The table stayed where the floor plan had placed it, but the small shelf moved closer to the chair. I had been putting the notebook on the floor whenever the quilt covered the table. That repeated action was better evidence than the first photograph of the empty corner. The shelf needed to serve the person holding the work, not complete the outline of the room.
I kept the route from the door clear while testing each change. A box could fit under the table, but reaching it meant kneeling in the path. It moved to the material shelf. The lamp base could sit beside the chair, but its cable crossed the place where a quilt edge fell. It moved against the wall. These adjustments did not require a new room concept. They needed a record of what happened during use and a willingness to change a choice that had seemed settled on paper.
The photograph shows the corner after those tests, with a clear surface and enough space to move. It does not mean that the room stays this way throughout a project. Cutting and pinning will fill the table. The useful question is whether I can return the room to a state where the next task can begin. I made a reset list with five actions: return tools, gather loose thread, fold unused cloth, close the needle case and leave the current note beside the work. This entry adds the room in use to the earlier reference photographs, so that the studio chapter contains both the intention and the result of living with it.
The table before the next seam
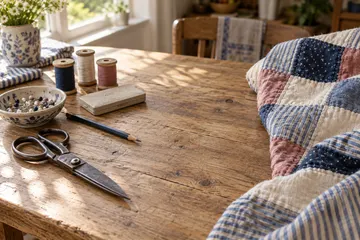
I arranged the tools around the work instead of lining them up for a photograph. Closed scissors stay within reach, pins have a dish, and thread has a place beside the fabric. The clear strip of table is the space my hands need. I want this record to show how a task begins, with enough order to find something and enough room to move it.
The setup is part of making
A missing spool can break the thread of a task before any sewing begins. I used to gather tools as I needed them, crossing the room for a pencil and returning to find the cloth had slipped. The studio gave me a chance to make a small setup for the current seam. I did not need every tool in view. I needed the few that belonged to the work on the table and a place to put them down.
The closed scissors sit away from the edge. The pin dish is shallow enough to see what it holds, and the needle case remains closed until I am ready to stitch. The photograph shows those relations, while the note records why they matter. I want a visitor trying a short seam to be able to follow the same setup without searching through a box of unrelated tools. For an open session, I will prepare one set for each place at the table and count the needles when the work ends.
This is a later making record, added after the first quilt photographs. It captures a habit learned through that project rather than another view of the same stitch. The process chapter now has loose pieces, a shared lesson, a seam, a fold test and a starting setup. Those entries can be read in date order or compared by the questions they answer. I will keep the original notes unchanged when adding this one. Their earlier uncertainty is part of the record, and the new habit should appear as a response to that experience rather than a rule I knew from the beginning.
The wall holds the whole quilt
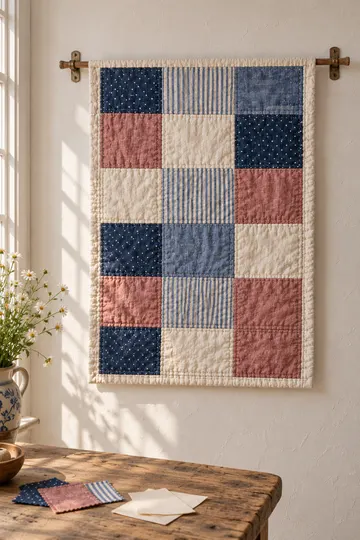
The quilt hangs from a sleeve that spreads its weight across the top. Open wall around the edges lets the pattern keep its shape, and the table below holds a few test pieces. I can compare the whole work with a seam without moving either one. The display has a focus and leaves room for a visitor to look.
The whole and the detail
Hanging the quilt changed its scale in the room. The chair version had folded some patches out of view, while the wall version showed the whole field. A border that had seemed quiet on the table became a clear line against the pale wall. I checked the hanging height from the door and from the chair, then left the work in place for a day before putting anything beside it. The empty wall gave me a way to judge the quilt without competing labels.
The table beneath it holds three samples and their notes. I chose them for different reasons: the shirt remnant shows the source, the pulled seam shows a problem, and the corrected join shows a change. The samples do not reproduce the whole process. They give a visitor points from which to enter it. The full notebook remains available beside the chair. Someone can choose the short view or follow the long sequence without being required to read every page before looking at the quilt.
This photograph joins the display chapter as its later record. I will keep the chair photograph there as well, because it shows a use that the wall cannot. The quilt is allowed to leave the rod and become a cover again. The sleeve, the clear route beneath the wall and the table arrangement all support that choice. A display should not turn the object into something I am afraid to touch. I want the wall to hold a moment in the studio's life while the record keeps the other moments available, including the ones that will come after the open day.
A place for someone to begin
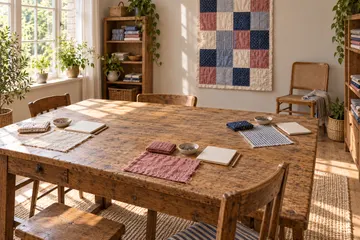
The open table has cloth samples, a notebook and a clear place for a visitor's hands. The finished quilt gives the room a focus, while the unfinished test pieces offer a way to take part. I left enough space between the places to lift a piece of cloth without disturbing someone else's work. The room can receive a person and a new idea.
The first open afternoon
The room was ready when the table had a place for work I had not planned. I set out the seam samples, put the needle cases beside them and left a section of the surface empty. That empty section was a choice. A visitor might bring a small repair, want to look through the notebook or need room to place a bag before sitting. Filling the table would have made it look complete and given the person less room to enter.
I began the afternoon by showing the shirt photograph and the finished quilt. The relation between them gave the conversation a starting point. The test pieces could answer questions about the join, and the plant sequence could lead to a different conversation about keeping a record through time. I did not need every visitor to follow the same route. The room offered a whole view from the door and smaller views from the table and chair. The notebook held the details for someone who wanted to stay with one part of the story.
After the session, I returned the tools to their cases and wrote down what the room had taught me. The clear shelf was useful. The chair needed a wider gap. One note was too far from the sample it described. Those changes belong to the next entry, not to a corrected version of the first afternoon. I want to retain what worked and what needed attention. The open studio is a point in a continuing record: thirty photographs, the notes that give them meaning and room for the next thing that arrives. The space can change while its earlier states remain available to revisit.
 Albumtale